Today I created an easy, elegant braid on Gabrielle. I'm going to tell y'all in words - no step-by-step pictures - on on how to recreate this look for yourself, or on someone else. : )
1. To add some texture and slight body to the hair. Start off by curling the hair in loose curls. (You can add a little bit of stylish gel to the hair before you curl it with the curling iron. Heat protection too, if you have any on hand.)
2. After you are done curling all the hair. Let it set for about 5-10 minutes (leave it alone).
3. Starting on the side of the head with the most hair, start twisting the hair into a roll towards the other side (you will need a few bobby pins). Once you have rolled to about the point you want to start the braid, flip the hair up and clamp with a hair claw, or something like it to keep the hair up and out of the way.
4. With the rest of the hair that is down, divide into two parts, as you would for a normal braid. With the piece closest to the front of the head, start twisting it, like in the picture (you won't need any pins). Keep twisting until you get closer to the rest of the hair in the back.
5. Once you are close to the back. Start braiding all three pieces (the two twists & the normal piece). Go about 1/2 way down then secure with a hair elastic (try to pick one close to your hair color).
6. If you want to do the hair wrap around the hair elastic, do the following. Take a smallish piece of hair from the middle. Wrap around the hair elastic a few times. Then poke it under the hair wrap and under one layer of the hair elastic. Doing your best to hid the ends. You want people to wonder, how on earth did she do that?!? ;-) And you are done!
I hope y'all enjoyed this little hair tutorial. If you need any help, just ask me! If you would like more of these let me know. Also, would you like more pictures next time?
Showing posts with label DIY. Show all posts
Tuesday, August 30, 2011
Thursday, August 25, 2011
DIY: Headbands
I love wearing headbands! But, my pocket book is not always willing to spend a lot of money on headbands. I have found that a lot of the cute headbands cost any where between $10 and $20. No, thank you; I can make my own for a lot cheaper and cuter too! Plus, these will be custom made and a million other girls will not own them either. =D
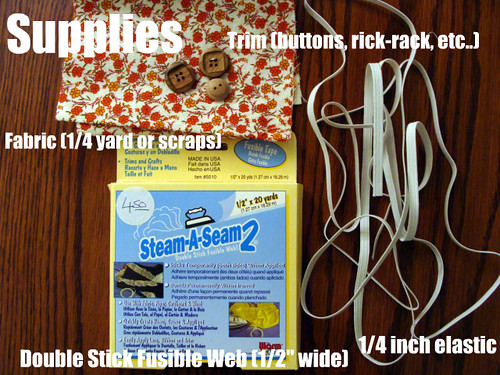
Supplies:
1. The first step is to measure your head. Like how I did in the picture below. Take note on your measurement, mine is 22 1/2 inches.
3. Now it is time for a little math. Follow the instructions below for the next step.
4. Cut out a strip of fabric that is the total of your math problem above (mine came up as 16 1/2 inches) in length, and 3 inches across (You can experiment with different widths for different looks).
5. Fold over an 1/2 inch on each side (the long side). Iron.
6. Fold strip in half lengthwise. Iron.
7. Cut a piece of elastic that is the measurement of the base of your head.
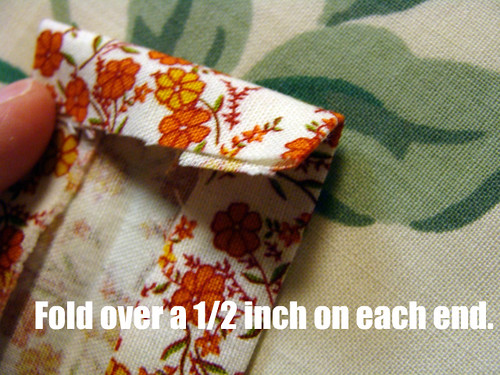
8. Fold over 1/2 inch on each end. Iron.
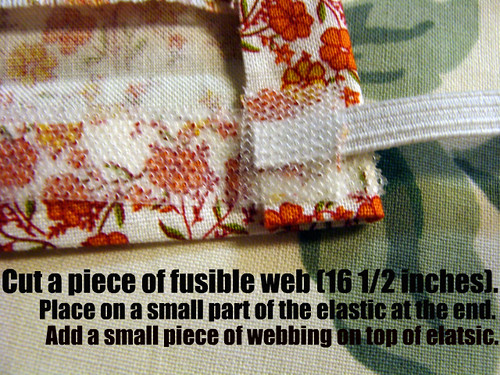
9. If you are using fusible webbing you will follow the photo instructions. If not, you will just skip to number 11.
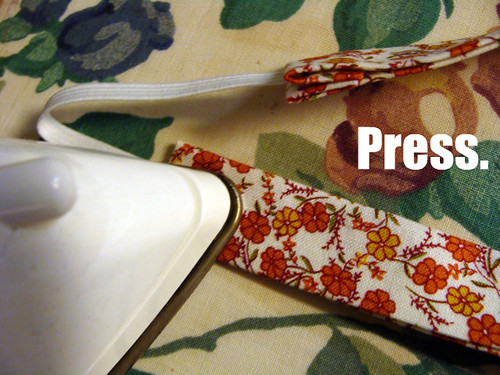
10. Press half way. Then repeat the second half of step nine, place a small part of the elastic on the other end, and remember to add a small piece of webbing on top of the elastic. Finish ironing.
11. Stitch around the open edges of your headband. Make sure to do a few more stitches over the elastic, making sure it won't come out anytime soon.
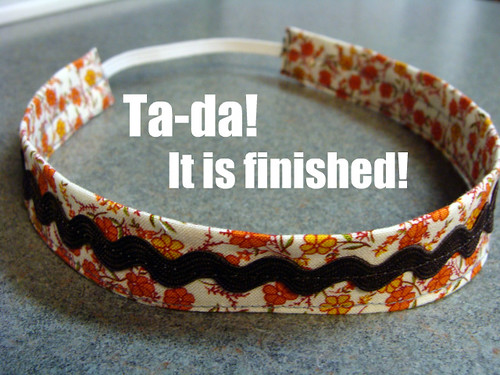
12. Now it is time for the fun part! Embellishing your headband in any way you want. I will show how to add rick-rack down the center of your headband.
How to Make Your Own Headbands
Supplies:
- 1/4 yard of Fabric (You can also just use scraps that you have laying around.)
- 1/4 inch wide elastic
- Thread
- Sewing Machine
- Iron
- Trimmings (Rick-Rack, Buttons, Lace, Fabric Flowers, etc...)
- Fusible Webbing (Optional) [Mine is 1/2 inch wide, sticky on both sides, and comes in a box. You don't have to have this, but I like how it makes the headband a little more sturdier, and I have less pinning to do when I sew the headband.]
1. The first step is to measure your head. Like how I did in the picture below. Take note on your measurement, mine is 22 1/2 inches.
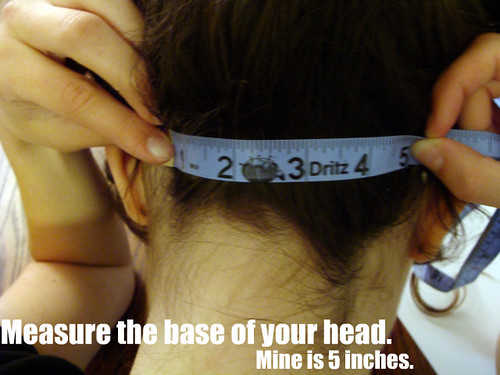
2. Measure the base of your head (see picture below). This is too find out how much elastic you need to cut. Mine is 5 inches.
3. Now it is time for a little math. Follow the instructions below for the next step.
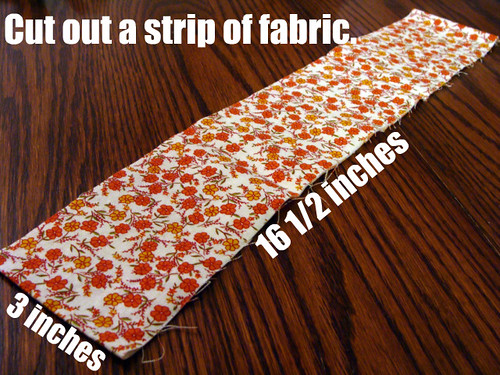
4. Cut out a strip of fabric that is the total of your math problem above (mine came up as 16 1/2 inches) in length, and 3 inches across (You can experiment with different widths for different looks).
5. Fold over an 1/2 inch on each side (the long side). Iron.
6. Fold strip in half lengthwise. Iron.
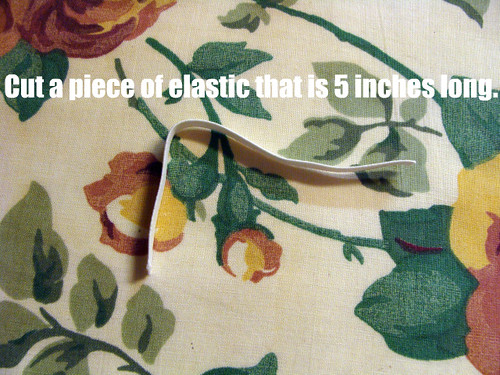
7. Cut a piece of elastic that is the measurement of the base of your head.
8. Fold over 1/2 inch on each end. Iron.
9. If you are using fusible webbing you will follow the photo instructions. If not, you will just skip to number 11.
10. Press half way. Then repeat the second half of step nine, place a small part of the elastic on the other end, and remember to add a small piece of webbing on top of the elastic. Finish ironing.
11. Stitch around the open edges of your headband. Make sure to do a few more stitches over the elastic, making sure it won't come out anytime soon.
12. Now it is time for the fun part! Embellishing your headband in any way you want. I will show how to add rick-rack down the center of your headband.
Tuesday, June 21, 2011
Tissue Paper Pom-Poms DIY Tutorial
In this post I mentioned I was going to be making my own tissue paper pom-poms. Well, guess what girls? I tried it out this afternoon to get a feel for it and if it worked, take pictures for a tutorial. As you can tell from this post's title - it worked out like a dream! =) Without further ado, the tutorial to make your very own tissue paper pom-poms.
You will need tissue paper {any color you want. I bought mine at Joann Fabrics.}; Ribbon {I'm using curling ribbon.}; and Scissors.
Take a stack of about 8 - 10 sheets of tissue paper and start folding according style 1 - 1 1/2 inches.
Once it is all folded, take a piece of ribbon {long enough to tie around the tissue paper and hang up your pom-pom} and tie it around the center of your tissue paper.
Cut the ends with either a rounded, or pointed look. Depends on how you want your pom-poms to look. Be careful, it can be hard cutting through all those layers. :)
Open it up like a paper fan you used to make while growing up.
Separate each layer of tissue paper gently, you don't want the tissue to rip. Then fluff out your pom-pom to get this look....
Look you created your very own tissue paper pom-pom! Go crazy and create a ton of these for weddings, parties, and just to decorate around your home.
Monday, June 20, 2011
Vintage Birthday Party DIY List

1. Tissue Paper Pom Poms - I love the look of these tissue paper pom poms that I found on Etsy. But instead of buying them off Etsy I'll just make my own. I already have a bunch of tissue paper in my stash {comes from having many hobbies, like making paper flowers when I was around 14 - 15}. If they turn out alright, I might do a tutorial. :)
2. Fabric Banner - I love the look of this fabric banner I found on Etsy. I have no idea where I would hang it up. Oh I know. I'll just have it drape along the wall. Yes, that will work out just dandy. Once again I won't be buying this, but making my own. This will be perfect for all my scraps. :)
3. Decorate the table with vintage patterns, magazines, and pictures. Using patterns from my stash and magazines I have collected over the years. It will help bring in that vintage vibe. As for pictures, I'll just print some of my favorite vintage pictures & old Hollywood pictures off my macbook. :)
4. What I wish I had.... A train case would be nice. As would vintage tablecloths, napkins, and dishes. But I don't have any of these at this time - maybe someday I will. :) There are some lovelies on Etsy.
Before I go, let me show you some inspirational pictures of some shabby chic, vintage-themed, parties & picnics.
{images from: Etsy. Personal. Tumblr.}
Saturday, June 11, 2011
Plans for my 21st Birthday Party... =)
In a little under a month it will be my 21st birthday. I have some big plans in the works to celebrate my birthday - like something for y'all. Lord willing, twenty-one of you will be receiving a gift. Yes, on my birthday I'm hosting a HUGE giveaway. A new giveaway posted every hour for twenty-one hours on July 5th {my birthday}. I'm warning you now so y'all don't go into shock. :p But I'm still looking for some more sponsors. Would any of YOU like to sponsor something. If you are interested, feel free to email me at: bramblewoodfashion {at} hotmail {dot} com.
Now about my birthday party. The theme is going to be vintage, with a slant towards the 1940s & 1950s {two of my favorite eras}. With my birthday being on the end of a long Holiday weekend, I might just have a camp out with my siblings where we watch some of my favorite old Hollywood movies. Or I might just do it with Gabrielle & Hanne-col. That way we can watch Roman Holiday, High Society, It Happened One Night and the like. You know, more girly movies ones my brother and little sister wouldn't want to watch. :)
![]() |
| Source {Hey YoYo} |
This is so much fun telling y'all about my party plans. It makes me sit down and really think how I want my party to be. Just so you know, I love having parties, attending parties, and planning parties. I adore celebrating events - big and small. It's just something I love and I've been planning our birthday parties since I was about 12, so about 2002. Wow! That mean next year I would have been planning our parties for one decade. I never realized that. Anyways, back to my party plans.
Where was I? Oh, yes. I need to tell you my ideas for my party. My idea for dinner is for us to go out to eat at Ted's Montana Grill. They have amazing bison burgers {yummy!}, great fries and even more amazing onion rings! Did I mention their ranch dressing, salted cucumbers, and lemonade? Yes, I dearly love their food. If you haven't tried them out yet - you must. It's really good. Oh, and they don't use plastic straws, but paper ones - I love them! :)
![]() |
| Source {Hey YoYo} |
![]() |
| Source {Hey YoYo} |
There is also the idea of having paper straws for our drinks - which I think is such fun! I don't know what it is, but I adore paper straws. They are so much prettier then plastic ones. :) Once again, I'll have to decided between polkadots and barber stripes. I think the dots are cute and different. But then again, the barber stripes are nice too. :)
Then there are decorations. I was thinking pink & white balloons, streamers, and cake plates. I would also do a few DIY projects for decorations. But I'll save that for another post. :) So ya, I'll talk to y'all in my next post.
Subscribe to:
Posts (Atom)


.jpg)